Antipyretics for children are prescribed by a pediatrician. But there are emergency situations with fever when the child needs to be given medicine immediately. Then the parents take responsibility and use antipyretic drugs. What is allowed to be given to infants? How can you lower the temperature in older children? What medications are the safest?
I am keeping this promise and telling you how I knitted a flower for an AMAZINGLY BEAUTY SCARF.
Everyone who saw it liked the scarf. But many - including me - have some technological misunderstandings.
During the trial knitting, nuances appeared that required attention.
In the process of solving them, a harmonious sequence was built, with all the amendments to the original, invented by me for creative convenience, and technological incidents.
CASE ONE: the thread laid to tie the petal kept trying to fall out.
In the original, the craftswoman holds this thread with her finger.
I was extremely uncomfortable, and I decided to make slits on the sides of the cardboard to secure the binding thread, and at the bottom for the main thread.

This gave the desired result: the threads were securely fastened and stopped moving.

Having secured the tip of the main thread in the bottom slot, I made 40 turns around the cardboard.
There were no problems, I even enjoyed laying straight rows.

CASE TWO: having removed the winding, I started tying, as suggested in the original,
where the craftswoman ties the loops of the petal, removing them from the cardboard.

But it was not there. The threads immediately became tangled, the loops became unevenly high,
and the result was this fluffy “damn lumpy” look.

Then I decided to tie the set directly on the cardboard. Immediately things went without a hitch.

Here each thread is visible, which easily connects with the next thread with a single crochet.

Having finished tying, I cut the thread longer. We will use it to sew on the petals.

Now we move our threads to the center and tie them at the bottom with the thread
which was waiting for this moment in the side slots.
Hidden here CASE THIRD.
If you simply knit the threads without thinking, you will get exactly the pom-pom
which several people have written about. After repeated attempts it became clear
that, having made the first knot, and without tightening it to the end, you need to remove the element from the cardboard.
We hold one end of the knotted thread - the left one - tightly, and pull the second end - the right one - to the right. The threads gather evenly in a row and the pompom disappears.

I made the first petal on a narrow - 2.5 cm - cardboard. From it I rolled up a bud-like center.

On a cardboard that was twice as wide as the first one - 5 cm - I made the main petals.

So I’m posting the flower.
On a cool autumn evening you just want a little warmth and comfort. Today we will talk about exactly the thing that creates it - about the crocheted poncho patterns and descriptions of which are given below in our master class!
Knitting capes for women from squares
We will need:
- yarn (75% polyacrylic, 16% cupro, 9% polyester, 90 meters per 50 grams) in four colors – black, silver 150 grams each, gold, copper – 100 grams each;
- hook No. 4.5.
The size of the finished product is 36-40.
Knitting density motives: ideally, one square should be 11 x 11 cm.
Scheme

Description of the cape for women
Knitting motifs
We start with the golden thread: we make a chain of 5 chains and connect it into a circle.
1 rub. (gold): 4 v/p (the first 3 v/p instead of the 1st s. s/n), 1 s. s/n in a circle, *1 v/p, 1 s. s/n in a circle, repeat from * x 5, 1 v/p, 1 connecting column in the 3rd v/p of the beginning = 8 tbsp. s/n.
2 r. (copper): attach the thread with 1 connecting s. to v/p between 2 s. s/n, replace the 1st s. s/n on 3rd v/p, perform another 1 s in this v/p. s/n, 2 v/p and 2 s. s/n, 2 s. s/n in the next v/p, * in the next. v/p 2 s. s/n, 2 v/p and 2 s. s/n, 2 s. s/n in next v/p, repeat from * x 2, ending with 1 connecting s. at the 3rd starting point.
3 r. (silver): attach a new color with 1 connecting s. to the next arch in the corner from the v/p, replace the 1st s. s/n for 3 v/p in this arch and perform 1 s. s/n, 2 v/p and 2 s. s/n in place after next. groups from the village s/n, 2 s. s/n, in the place after the next. groups from the village s/n, * next arch from military grade 2 s. s/n, 2 v/p and 2 s. s/n, 2 s. s/n in the interval after the next. groups from the village s/n, 2 s. s/n in industrial after the next gr. from the village s/n, repeat from * x 2, ending with 1 connecting s. at the 3rd starting point.
4 rub. (black): like the 3rd row, while eating as before in the corners 2 s. s/n, 2 v/p and 2 s. s/n in one loop of the base and in each gap between two groups of s. s/n perform 2 s. s/n.
Description of the cape for women: backless
We need to knit 28 such squares for the back and front, distribute them according to our pattern and connect them with a crochet hook to the outside. sides with black yarn and 1 r. With. b/n. Starting from the middle square at the top and half a square on both sides of it, there is a neckline cutout that needs to be tied.
1st row: + yarn between 2 groups from s. s/n, replace the 1st s. s/n for 3 v/p 1 tbsp. s/n in the same paragraph of the base, then in each word. the interval between 2 gr. from the village s/n we knit 2 s. s/n and ending. Row 1 with a connecting stitch in the 3rd chain stitch of the beginning.
2-3 rubles: same as 1st.
Simple poncho: video master class for beginners
https://youtu.be/29OWm6yfRcw
Crochet white summer poncho
Description of the cape for women
Knitting motifs
We dial 12 v/p, connect it in a circle. column.
1 p.: 4 v/p, 1 s. s/2n in a circle, 4 v/p, 1 s. b/n in a circle, (4 v/p, 2 s. s/2n in a circle, 4 v/p, 1 s. b/n in a circle) – x 7, 4 v/p, connect. With. in the 4th stitch of the row.
2 rubles: 4 v/p, 3 s. s/2n together, (arch of 9 v/p, 4 s. s/2n together) – x 7, 5 v/p, 1 s. s/2n in the 1st stitch of the row.
3 r. (only for the first motive!): 15 v/p, 1 s. b/n in the arch, (9 v/p, 1 s. b/n in the arch, 15 v/p, 1 s. b/n in the arch) – x 3, 9 v/p, connect. With. in the 1st stitch of the row.
3 r. (for all other motives): 7 v/p, connect. With. in a long arch of another motif, 7 v/p, 1 s. b/n in the arch, (4 v/p, connecting s. in the short arc of another piece, 4 v/p, 1 s. b/n in the arch, 7 v/p, connecting s. in the long arc of another piece motives, 7 v/p, 1 s. b/n in arch) x 3, 4 v/p, connecting. With. in a short arc of another piece, 4 v/p, connecting. With. in the 1st point of the row.
Description of the cape for women: gathering
We will need to knit 42 of these pieces, connecting them together along the way. Then the almost finished product needs to be tied.
1 p.: *1 p. b/n in the arc of the motivic, (15 v/n, 1 s. b/n in the next arc of the motivic, 15 v/p) – corner, (1 s. b/n in the next arc of the motivic, 9 v/p) ) – repeat until the next corner, repeat from *, connecting. With. in 1 s. b/n row, turn.
2 p.: 5 connecting. With. (move the thread to the center of the arc), * (1 s. b/n in the next arc, 9 v/p) - repeat to the next. corner, (17 v/p, 1 s. b/n in the next arc, 17 v/p, 1 s. b/n in the next d., 17 v/p) – corner, repeat from *, connect. With. in 1 s. b/n row. We tie the neck with one p. With. b/n. if desired, make tassels.
Poncho with fringe: video master class
Chunky crochet poncho
Description of the cape for women
We knit a chain of 82 chain stitches, divide stitches starting from the middle of the back as follows: 5 stitches for the back raglan line, 8 stitches to the side, 5 stitches for the line. reg., 10 p. side, 5 p. reg., 8 p. to the middle of the front, 5 p. reg., 8 p. to the side, 5 p. reg., 10 p. sides, 5 reg., 8 stitches to the middle of the back. knit with. s/1n, reg. lines We carry out according to cx. 2.1 and 2.2 Along the line. reg. front and back knit. without increments, along the sides we make increments according to cx. 2.2. Knit 38 cm in height, finish the sides and continue to knit the front and back parts of the product separately.
To get an angle, we decrease on both sides of two parts, starting from the side lines of the regulation, 7 times by 3 sts and 3 times by 4 sts in each row. At high 56 cm we finish the work, we tie the edge with a border according to diagram 2.3.
Sleeves
From L. reg. we retreat the side part up 7 cm and knit. from top to bottom in a circle c. s/n, decreasing for bevel 8 times each. 2 r. 2 p. each, prov. vm. 2 times 2 unfinished s. s/n. After 30 cm we finish the work and tie the bottom of the sleeve according to diagram 2.3.
If you want to make a fringe: fold 2 threads of 30 cm in half and fasten them to the protrusions.
White poncho with pineapples: video master class
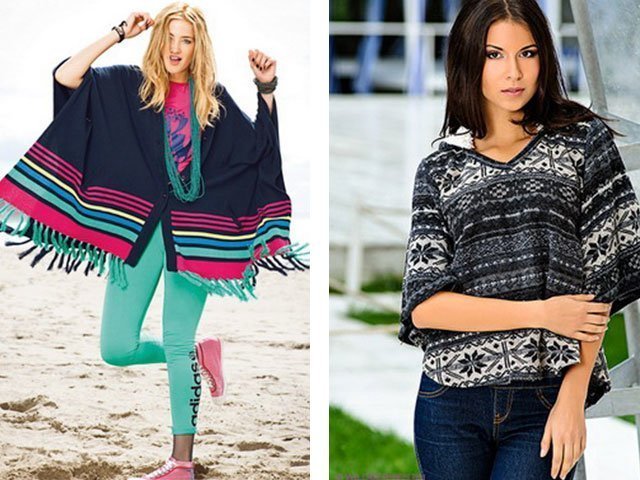
This fall everyone's favorite is coming back into fashion poncho – it has gained popularity in almost all fashion houses this year. Even though it's quite extravagant wardrobe item , it appealed to many girls and women. With it you can create unique original images for every day.
It replaced our usual short coats for autumn and early winter. Due to its thick knitting, it came in handy for this cool season. It can be worn on top of a cardigan or tunic, or on a jacket. Such women's ponchos began to be made with long sleeves, with buttons, sometimes with cuffs, a hood or a collar. In our article you will find many different patterns with a description of how to crochet a warm poncho for girls, for women, simple, round, for obese women. This section will help beginners knit their first thread product for the first time, guided by excellent and interesting tips.
Crochet poncho for women
This wide cape with a regular neckline for the head
came into fashion back in the 70s. It took very little time for these clothes to become an integral part of a woman's wardrobe
. After some time, they began to decorate it and decorate it in different ways, forgetting that it was a Mexican creation. 

Now it can be worn as adult
, so buy it children
. Also at any time of the year: even in winter, even in summer. It is also great for women of any body type - the thing is loose and will help hide extra centimeters
. But even better is that now you can crochet it, because we will include various patterns and descriptions of knitting in the article. 


The most daring and catchy look this season was poncho with hood
. It is knitted from thicker, warmer yarn and is often made with sleeves.
For spring, designers offer mesh and openwork items made from light woolen fabric. They perfectly highlight the silhouette.
But the most fashionable are beautiful and fashionable checkered ponchos, with prints and patterns, fringes, patterns
. You should definitely consider whether its color scheme matches the time of year outside the window! 

How to crochet a poncho: diagrams and description
Crochet poncho: patterns and descriptions for women for beginners awaits you below. And now we will give a couple of tips to everyone who wants to create such a thing:
Popular articles:
- Always use natural threads, yarn.
- Buy yarn from stock so as not to perform unnecessary actions at the most inopportune moment.
- Calculate everything correctly measurements in cm.
- If you are knitting for the first time, then take the trouble to find a few video lessons And master classes knitting to learn.
- Study the offer well diagram and description. Find the explanation of all abbreviations used in the diagram.
- Carefully and carefully monitor the received product: wash it properly, care for it to extend its service life.
So, let's start simple: Crochet poncho “Pink Lagoon”. For it, take the required amount of yarn and follow the diagram and description.

Next is a diagram of a product knitted from motifs. It is very simple to implement.


The following openwork poncho is perfect for evening walks, dates, and cycling.

Crochet poncho granny square
To create this square poncho, knit according to the pattern below. For beginners, we will write a detailed description:

Crochet a poncho for a woman: new models
New models poncho differ in beautiful patterns and bright colors. We offer you a model made from squares with beautiful knitted flowers. Such a thing can be worn by overweight women; it will very well hide what needs to be hidden.
To do this, take 500 grams of light-colored yarn : can be beige, pink, white. Hook No. 3 is quite suitable for the job. So, the square is knitted in a circular pattern, starting with a chain of 6 v.p. connected into a ring S.S.
- 1 R.: 12 S.B.N. (do not knit the first S.T., make 2 V.P. instead). In the 2nd V.P. began to complete R. With the help of S.S.
- 2R.: 12 cones with an interval of 5 V.P. Finish the row with 2 V.P., 1 S.S.N. into the first bump.
- 3R.: arches from S.B.N.,
(replace the first S.T. with 2 V.P.). Knit cones in the corners, then for the corner P. knit 3 V.P. and S.S. to the top of the cone. Finish R.S.S. Repeat from 1 to 3 R.
You need to make 110 squares and attach them to each other.

Crochet shawls, stoles, ponchos patterns and descriptions
Simple summer crochet poncho
Just a summer product made from motifs - flowers from peach thread 400 grams and a hook size 2.5.


Crochet poncho for girls
Any little girl want to be a real fashionista like her mother. To do this, you just need to knit her a beautiful poncho so that she can show it off to her friends.
Crochet poncho for girls from 1 to 3 years old


Crochet poncho video
Crochet poncho video - Bersanova lesson
Particularly fashionable in the 70s and a little forgotten, ponchos have returned to city streets. Such products are rarely available in stores. Any beginning craftswoman can crochet a beautiful poncho for herself or her little daughter.
A poncho is essentially a rectangle or square with a neck cut out. Often the product is sewn on the sides at the bottom, highlighting holes for the hands. Sleeves can be decorated with cuffs. Fashionable models are complemented by voluminous hoods.
The poncho is a very controversial item of clothing; there is an opinion that such a cape makes the figure bulky. From another point of view, a poncho advantageously hides imperfections.
For the indigenous people of South America, the poncho is part of the national costume. Here it is traditionally made from wool. Each locality has its own pattern on the back and front of the poncho. In other countries, any fabric can be used for this purpose.
Crochet poncho is best worn in warmer months
A poncho can be worn regardless of the time of year. For each season, fashion designers offer models made from various materials and differing in style. The color scheme, pattern and fabric are chosen according to your own taste. The main thing is to maintain the main ideological line of this type of clothing, the rest does not matter. You need to know how to wear a poncho; it does not suit every outfit.
The voluminous top looks good:
- with tight-fitting semi-sport trousers;
- jeans;
- short skirts.
The large mass of the upper body is perfectly balanced by the lightweight lower body. Due to the free lines of the top, it is possible to correct the figure and hide its flaws. Knitted openwork summer ponchos - jackets and coats - are especially popular among obese women.
Don't try to combine a bulky top with:
- long and wide skirts;
- trousers cut like harem pants;
- classic skirts and trousers.
 Poncho is worn with jeans, skinny trousers and a short skirt
 A combination of a voluminous cape and an equally bulky long Tatyanka skirt will look heavy on short, plump ladies. A poncho looks even more ridiculous when combined with a short flared skirt.
A poncho is a popular type of clothing for pregnant women because the voluminous, free-flowing folds help hide the belly. Tall, slender girls look good in ponchos.
A fashionable poncho, depending on the style and material, may look like:
- blanket,
- raincoat,
- jacket,
- sheepskin coats,
- jumpers,
- down jacket,
- coat,
- blouses,
- dresses,
- fur coats,
- robe,
- shawls.
What you need to crochet a poncho
You can make a crocheted poncho for yourself, because... There are a number of advantages to making things with your own hands.
Related clothing:
- it will cost less than things bought in a store;
- will realize his own artistic concept;
- will exist in a single copy.
For beginners, it is best to take up knitting a poncho in the form of a shawl. It can be knitted in segments, pattern details, or simply by picking up the fabric, gradually rising, row by row.
Yarn selection
Before making any type of clothing, you need to create a sketch. Then, based on the artistic intent and purpose of the item, a suitable material is selected.
 To knit light summer ponchos, choose thin yarn
 A summer cape can be openwork. A thin thread or yarn is suitable for it. Winter models should not only be beautiful, but also warm. This item is knitted from thick wool threads. A thick knitted fabric can replace a demi-season coat.
Yarn is selected based on:
- purpose of the model;
- fabric density;
- design and color of the future product.
Table. Approximate calculation of yarn for a poncho - jumper.
Hook selection
The hook with which the fabric will be picked up must correspond to the thickness of the yarn. Thin metal hooks, pointed at the tip, are designed for knitting summer patterns from “Iris”. These hooks are good for crocheting individual lace segments of openwork items. A warm item made of thick woolen threads is knitted with hooks number 3.5 or larger.
The hook can be made from:
- bamboo,
- bones,
- plastics,
- aluminum
- tree.
 For knitting a poncho, you can choose a hook from different materials, but take into account its size - this affects the thickness of the product
 The material from which the hooks are made does not affect the product in any way. Each knitter chooses the most pleasant and familiar tool for herself. The main thing is that the hook number matches the thickness of the yarn.
Calculation of the amount of yarn
Calculating the amount of yarn required for production is simple:
- purchase one skein of the yarn you like;
- select a hook suitable for this thread;
- the first row is knitted according to the chosen pattern to the required length;
- a turn is made and the second row is knitted according to the pattern;
- the length of the resulting two-row chain is measured again;
- if the chain corresponds to the required size, a mark is placed on the last loop of the second row;
- knitted lines unravel;
- a piece of thread is measured with a centimeter from the beginning to the mark;
- calculate the total number of rows in the pattern;
- the number of rows is divided by two and multiplied by the length used to knit the first two rows of thread.
- The length of the thread in 1 package is indicated on the skein of purchased yarn; all that remains is to divide the result by this measure.
Some manufacturers indicate the yarn number and its weight instead of the thread meter on the skein. In this case, the consumption can only be calculated experimentally. You can try to continue knitting the fabric until the purchased skein is completely used up, then measure the number of rows knitted and, based on the result obtained, calculate how much yarn should be purchased.
This method allows you to accurately calculate consumption. The only bad thing about it is that by the time the trial skein runs out, the store may run out of the yarn you like.
In this case, you should ask the seller:
- is there such yarn on sale and how often does it arrive in the store;
- Is there any information about the number of meters of thread in a skein?
Types of patterns for crocheting ponchos
The pattern on knitted clothes can be any. Decorative trim and knitted patterns are selected depending on the purpose of the poncho and the taste of its owner.
Openwork items are woven using thin threads using lace patterns. Summer beach models can be knitted from floral motifs connected by air chains. Parts may have different colors. For example, leaves and stems are knitted with green threads, flowers with pink and peach, and the composition is connected with delicate airy chains of milky color.
Warm winter clothes that look like a demi-season coat or jumper can have several rows of voluminous braids on the front. Dense warm products are often made in the form of a continuous sheet. Patterns on such things are knitted by changing the color of the yarn.
 Examples of patterns for ponchos
 A house robe and dress in ethnic style will look great with a pattern of multi-colored stripes.
Light ponchos can be decorated with ornaments created by:
- knitting a pattern with one thread according to the pattern;
- embroidery with ribbons and woolen threads on a knitted mesh;
- changing the color of the thread during knitting.
Step-by-step instructions for knitting a classic women's poncho with a simple pattern
A crocheted poncho for home use in the form of a blanket is made in the shape of a rectangle.
On a model designed for the cool season, the simplest patterns are knitted. Such a thing should warm its owner. Thick woolen threads and a suitable style are selected for it.
The choice of yarn needs to be given great attention. It is not advisable to knit household items from white Angora wool; they will quickly lose their appearance. Colored wool and acrylic threads work well.
Product drawing
The creation of any thing begins with creating a sketch, drawing a drawing and taking measurements. The poncho only requires a few sizes. The length of the product is measured from the shoulder to the desired hem point. The width of the product is measured from the right hand through both shoulders down to the left hand. Your hands should be down while taking measurements.
For the drawing, take a sheet of thick film or paper of suitable size. Many knitted patterns are created by pinning individual segments onto a design, which are then connected by chains of chain stitches. The drawing is made in full size; marks may be placed on it indicating the location of individual parts.
 Before you start knitting, you need to make a drawing of the product
 The drawing is built in stages:
- A segment AB is drawn on paper, equal to the width of the product;
- the distance from point A to point B is divided in half and designated by point B;
- from point B perpendicular to line AB in both directions a value equal to the length of the product is deposited, the resulting points denote G (along the front) and D (along the back);
- through points D and E draw lines parallel to segment AB;
- From points A and B, perpendiculars are set along the back and front until they intersect with the lines drawn through D and D.
The result should be a large rectangle, divided in the middle by the line AB into two equal parts. All that remains is to mark the neckline. From point B, 15 cm are set aside to the left and right (the cutout may be larger).
Back
Knitting:
- Step 1. The chain of the first row is made with air loops. Its length must correspond to the segment of drawing AB.
- Step 2. At the end of the chain, three air loops are made for reversal.
- Step 3. The first row is knitted. The calculation is carried out like this: three air loops, then a double crochet, six air loops and again a double crochet. This is how the entire row is knitted until the very end.
- Step 4. Three air loops are knitted for lifting.
- Step 5. Knit three chain stitches, then double crochet and three chain stitches again. The row is knitted with this alternation until the end.
- Step 6. The third row is knitted like the first.
- Step 7. The entire fabric is knitted according to the described pattern. The size of the finished canvas should be equal to half the rectangle shown in the drawing.

Rice. 1. Knitting pattern for a classic poncho.
Front end
The front part of the product is made in the same way as the back. There is no difference. The finished poncho - the shawl should be the same size as the back.
Product assembly
Two rectangles are combined along the topmost rows. They are connected to each other by knitting a single crochet through every two loops of the last rows located opposite each other. Leave the section allocated for the neck unconnected.
It is advisable to rinse the finished product in warm soapy water. Wring it out in a towel and stretch it to dry on any suitable surface (mattress, carpet). The edges of the knitted product must be fixed, otherwise it may become deformed during the drying process.
 Decatting the yarn (soaking it in water and then drying it) will save the finished product from shrinking after washing
 Important! To prevent the knitted product from shrinking after the first wash, it is recommended to decatify yarn made from natural fibers (wool, cotton) before working with them. To do this, the skein, without being wound into a ball, is soaked in warm water and then dried on a hanger.
How to knit an elegant poncho for a girl
Crochet poncho for a little girl using the classic pattern, in the form of a rectangle or square consisting of equal triangles. Mom's fashionista will be happy with a beautiful new thing.

Rice. 2. Children's clothes should be bright; milky and bright yellow yarn is suitable for this model.

Rice. 3. Diagram of the central part of the product.

Rice. 4. Designation of circuit elements.
Knitting the main fabric of the product
The work is carried out in the following order:
- The chain is made of 80 VP with white yarn.
- The chain is closed with an SS loop.
- First row - 3 runways are knitted, then 40 dc loops, we close them into a ring of 1 runway.
- The second row is 3 runways for turning and lifting, then through one arch from the runway of the previous row, 3Dc and 1 runway are knitted (total 20 repeats).
- The third row is 3 runways for lifting and turning, then we divide the previous row into 4 equal segments, consisting of 5 repeats. We knit 3Dcs 5 times into the VP arch of the previous row, and we knit another 3Dcs into the last VP of rapport. The pattern is repeated 4 times.
- From rows 4 to 14, work is carried out according to the scheme of the third row. The expansion of the fabric is achieved through additional loops that are knitted clearly one above the other. The displacement leads to a violation of the pattern.
Along the neckline, lacing of the required length is knitted from VP.
Decorative bottom of the product
The finished middle part of the product can be tied with lace created according to any of your favorite patterns. Large segments of flowers and leaves would look appropriate here. The openwork parts are connected by chains of air loops.
The lower finishing part of the poncho is knitted with yarn of a bright sunny color. For their fashionista, mothers can take any other shade that suits her daughter’s face better.

Rice. 5. Trimming diagram for the decorative bottom.
Interesting poncho models, their knitting patterns
The appearance of a knitted item depends on the taste, imagination and experience of the craftswoman. Only those who have been involved in this hobby for more than one year can come up with a new scheme. For other lovers of home knitting, there are a large number of patterns of varying complexity.
Outfit for a summer evening
A woman of any age will like a crocheted poncho for a summer evening. To create such an openwork cape, you need to draw a drawing.
- According to the pattern, the required number of segments is knitted. As production progresses, all parts are laid out on the drawing.
- When the motifs occupy the entire area of the design, you can begin assembling the product (the recommended number of motifs is 16 pieces).
Rice. 6.

- The finished segments are connected according to the drawing in Figure No. 8 with chains of air loops.
Rice. 7.

It takes 400 g of peach-colored synthetic acrylic yarn to make 16 pieces with a diameter of 20 cm. A thread of medium thickness is crocheted No. 2, 5.
The neckline is knitted from the first to the second row using single crochets. Starting from the third to fifth row, knit every 4th and 5th stitch together. In the next two rows, knit every 7th and 8th stitch together. The last row is knitted with single crochets.
With a classic square design
A crocheted poncho for special occasions will be a stunning addition to a little black dress and shoes with high square heels. The cape poncho is assembled from individual square parts.
Each of the segments is assembled according to the following scheme:
- A chain of 6 V.P. is knitted, at the end they are connected into a S.S. ring.
- The second row begins with 3 runways for lifting and turning, then 2 dc, 2 ch, 3 dc are knitted, the rapport is repeated.
- The 3rd row is knitted like this: 3 runways, 2 dc under the ch of the previous second row, 2 ch, 3 dc again in the ch of the previous row.
- This is how all other rows are knitted.
A neat angle is done like this: 3 dc, 2 ch, 3 dc. The number of rows can be any. The recommended segment size is 20 by 20 cm. Finished parts are laid out on the product drawing. When the field of the design is filled, the parts can be sewn together or connected using SS.

Rice. 8. Black cape made of squares.
Among lovers of home knitting, the segment pattern is called “Grandma’s Square.” Based on such a motif, you can create your own unique product, such as in Figure No. 9.

Rice. 9. An item for everyday use. This cape is made from square multi-colored parts.
Lace dresses for special occasions
Things created using the Irish lace technique look especially beautiful. Such a product costs a lot of money, and not everyone can afford to buy it. The work begins with the creation of a drawing and sketch. Not only the dimensions of the future product are applied to the paper, but also an approximate drawing of the location of the parts.
The first step is to knit all the segments one by one. Each created part is pinned to the drawing with pins. During the work process, the design of the product is adjusted, and changes are made along the way.
The work requires a lot of patience, since the poncho is knitted from Iris threads, so the details take longer than motifs made from thick acrylic or wool yarn.
Most often, the details take the form of stylized flowers and leaves of different sizes and colors. They can be located at some distance from each other or partially overlap in some places. The segments are connected to each other by a mesh connected with air loops.

Rice. 10. White poncho knitted using the Irish lace technique. This photo shows a product consisting of identical motifs.

Rice. 11. Product parts may have different shapes, colors and sizes. Things look impressive when a little thicker yarn is used for details, and the connecting mesh is knitted from threads one number thinner.
The most common details of Irish lace are leaf and flower, knitted according to the patterns shown in Figures 12 and 13.

Rice. 12. Flower knitting pattern.

Rice. 13. Pattern for knitting leaves with flowers.
Making a crocheted poncho with your own hands for going out or for home use requires the craftswoman to strictly follow all stages of the work. You can’t do something of high quality without clear calculations. Before starting work, it is imperative to create a sketch and drawing of the future product. Complex fragments are knitted before work begins.
Article format: Natalie Podolskaya
Video about knitting a poncho
Crochet poncho - knitting in this video:
Poncho is a very ancient type of clothing. It first appeared among residents of Latin America. This word means “lazy”. This type of clothing received this characteristic because it is a continuous fabric without sleeves, with a hole for the head. On world catwalks, such outfits began to win pride of place in the early 60s of the last century. Knitting such a stylish thing as a poncho with regular crochet is currently at the peak of popularity among fashionistas.
Just look how beautiful handmade ponchos are!
Anyone who has ever worn knitted clothes knows for sure that these are the most comfortable and practical things! They can also be made airy and beautiful with a little effort and knowledge!
The ponchos and needlewomen did not leave their attention. This type of clothing is also knitted with great success. On the streets of the city you can see girls, young women, women and older ladies wearing various ponchos, distinguished by a variety of models, colors, and thread texture. This suggests that the poncho has no age; both young people and old people love it.
The time has come for you, dear knitters, to learn how to knit a stylish new thing. Our article will help you with this; we will provide all the necessary diagrams. Here you will find easy-to-knit patterns and free knitting patterns.

Crochet a poncho-cape for beginners with patterns
In a woman's wardrobe there is always a place for such a beautiful thing as a poncho-cape. To knit such a pattern you will only need a couple of evenings, a little patience and effort.

To work you will need 700 g of medium thickness yarn, hook number 2.5.
Let's look at a simple step-by-step master class
Knit 40 cm chains of air loops. Then knit 10 cm with the “Grid” pattern according to the pattern. Next, add a chain of v.p. on each side. another 10 cm and continue knitting another 10 cm for the ledges. Repeat this expansion of the canvas 2 more times. In the last extension of the increase, you need to make sure that the width of the product is 150 cm. After knitting 40 cm from the start of work, knit the neckline. Cast on with a chain of v.p. neck and continue knitting the second half of the product, similar to the first. Decorate the neck with a tie made of st. b/n. Attach tassels along the bottom edge. All knitting should be done in accordance with the pattern shown in the next photo.
Schemes and description, we work according to a simple pattern:
An original poncho-cape, knitted according to the tips from the master class, can become the “highlight” of any outfit.
Be sure to watch the free video tutorial for beginners.
We create an openwork poncho with detailed instructions for work
One of the most popular patterns for knitting clothes is the pineapple pattern. Things made with the pineapple pattern are airy and light. Knitters successfully use this pattern in knitting capes. In this section of the article you can see a description and diagram of an openwork poncho with a “pineapple” pattern.

Sequence of work for beginners
Everything is knitted according to the pattern shown in the photo below.

The size of this poncho model is 36-40. For knitting you will need acrylic thread - 400g, hook No. 3.5.
The entire product is knitted according to pattern No. 1. At the beginning of each row, cast on 3 vp. rise.
The poncho consists of two identical halves. Knitting occurs from the bottom up. Knit a chain of 29 vp. and knit with the main pattern according to the pattern and pattern. At a height of 65 cm from the start of work, finish knitting this part. Knit the second half in the same way as the first. Sew the details. Decorate the neckline with a binding of 6 rows of st. b/n. and 1 side by side with a pattern according to pattern No. 2. Tie the bottom of the product 1 side by side according to pattern No. 2 and decorate with fringe.
Knitting pattern for such an openwork thing:

If this model is made with 100% cotton or viscose thread, then it will already be a crocheted summer poncho. This airy openwork poncho will not only warm your body on cool summer evenings, but will also add romance and femininity to your look.
Watch the video for more details.
And also, to diversify your wardrobe, tie it; like a poncho, you can throw it over your shoulders on cool days.
Stylish poncho made of motifs for the most stylish and confident
Ponchos made from motifs will never go out of style. At first glance, it seems that knitting motifs can only be done by professional craftswomen. But this is a mistaken opinion. Knitting motifs is interesting and not at all difficult. Try it and you will see for yourself. The following master class for beginners is offered to help you.

In the photo above you see an original spring-autumn poncho made of colored square motifs.
Let's look at the step-by-step execution of the product
To knit such an accessory from square motifs, you will need 200 g each of brown and curry yarn, 150 g of white yarn and rust color. Yarn type: wool blend. Hook No. 12.
Square motif diagram:
Square. Cast on a chain of 4 vp. and close in a circle. Knit according to the pattern in circular rows, replacing the 1st stitch in each row. s/n. on 3 v.p. End the row with a connecting column.
Alternation of colors No. 1. Chain of v.p. and 1st row - brown thread.
Row 2 – curry color.
Row 3 – sand color.
Row 4 – white thread.
Alternation of colors No. 2. Chain of v.p. and 1st row - white thread.
Row 2 – curry colored thread.
Row 3 – sand color.
Row 4 – brown thread.
Knitting density: 1 square equals 24x24 cm.
The back and front are knitted the same way. Knit 4 motifs according to alternating colors No. 1 and 4 motifs according to No. 2. Sew these squares with an over-the-edge seam according to the pattern shown in the photo below.

We quickly assemble our parts
Along the shoulder line, sew the back and front of the product. Make the harness as follows:
1 round row. *1 tbsp. b/n., ch 1, skip 1 loop*. Repeat from *.
2 round row. Knit in the same way as 1st, only knit st. b/n. into the air loops of the previous row.
An original addition to this poncho of motifs can be armbands, which are made from 1 square and sewn. The edges are tied with 1 circular row of stitches. b/n.
Wearing such a warm and attractive poncho made from crochet motifs will make you stand out from the crowd on the city streets.
A bright cape for a couple of evenings for a girl
A bright multi-colored poncho for girls that allows active movement will delight any little princess. We invite you to knit such a “fun” model with your own hands.

This model is knitted in a continuous pattern, starting from the neckline. You can use leftover yarn of different colors to work with.
Attention! It is important to cast on the number of air loops for the neck that is a multiple of 8.
Knit in the round according to the pattern shown in the photo below.
Schemes and description:
Continue knitting until the product reaches the length you need. Decorate the neck and bottom edge with a “crawfish step” binding or any other one of your choice. Decorate the corners along the bottom edge of the product with multi-colored tassels.
This pattern will help you create a real masterpiece of “knitted art”. Your little one in such an outfit will be the center of attention on the playground or in kindergarten, and if you are inspired by our article and update your daughter’s wardrobe with new knitted outfits, her happiness will know no bounds.
I would like to believe that this information will inspire knitters to pick up a hook and thread and help them carry out the process of creating unique handmade items. Creative mood to you, dear craftswomen, and easy stitches!
And also, just for your information: a poncho can be crocheted not only with crochet, but also.