Antipyretics for children are prescribed by a pediatrician. But there are emergency situations with fever when the child needs to be given medicine immediately. Then the parents take responsibility and use antipyretic drugs. What is allowed to be given to infants? How can you lower the temperature in older children? What medications are the safest?
You can sew it in a matter of minutes, and then put it in your purse, thereby making it a functional storage for everyday little things. Your daily routine will also become more organized.
Necessary materials
- A rug or piece of thick fabric 30 cm long and 45 cm wide
- Thick sewing machine needle
- Threads to match the fabric color
- Pins
- All the necessary little things that you usually carry in your purse
Instructions
- Take the longest item that will be in the organizer and place it against the bottom edge of the fabric to determine the depth of the pocket. This could be, for example, a smartphone. The edge of the fabric will need to be folded up to a comfortable height.
- Sew the edges of the resulting pocket as close to the outside of the fabric as possible.
- Place items in the organizer to mark the sides of the pockets to store them. If the fabric pattern allows, it is enough to mark these lines with pins. Otherwise, you can first mark them with chalk or special soap, but then the organizer will need to be washed. If you don’t have all the necessary little things at the moment, you can take existing ones. Many items are interchangeable.
- Take out all the items and sew the pockets along the marked lines.
- Place the necessary items in the organizer and put it in your purse.
- If the bag is small, the organizer can be rolled up. If the fabric of the organizer is thick, it can be removed from the bag and placed on a table or bedside table.


9 items you should carry in your purse
Before you sew an organizer, you should think about all the things that will be in it. The contents of each handbag are individual, but there are necessary little things that are equally important for everyone.
- Phone charger. A dead phone can cause a lot of problems.
- Lip balm.
- Moisturizing hand cream. It will come in handy in cold weather, when the skin on your hands is especially vulnerable and quickly becomes dry. A cream with a pleasant smell can be an alternative to perfume.
- Medical patch.
- Wet wipes: a convenient thing for different occasions. Helps deal with dirt on your hands, face or on various surfaces.
- Pens. Sometimes it is necessary to sign a document or receipt. A small notebook for notes would also be helpful.
- Hand sanitizer. It is especially necessary when there are children around who do not always wash their hands thoroughly.
- A bottle of water. Thirst sometimes strikes you at the most inopportune moment.
- Cereal bar or candy. Snacking is important in times of hunger and low mood.
Our review contains many ideas plus three detailed master classes.
Textile organizer with pockets
Based on a step-by-step master class on making the simplest basic model of a wall organizer, you can make any organizer - with more or fewer compartments, a wider or longer organizer, or a bathroom organizer from waterproof material.
You will need:
- A large piece of fabric for the double-sided base of the organizer;
- Smaller cuts are for pockets;
- Thin, durable plastic material to reinforce the base and pockets (if desired, you can use dublerin and glue it to the fabric with an iron);
- Ribbon or finished bias tape of sufficient length to cover pockets and the base of the organizer;
- Eyelets
Step 1
First, decide on the size of the organizer and pockets. For example, in this case we start from the dimensions of a standard A4 sheet - you can use it as a template. Cut out rectangles of appropriate sizes from plastic, and pieces of fabric twice the size, not forgetting a few centimeters for the volume of each pocket and good seam allowances.Step 2


photo: blog.spoonflower.com
Fold each pocket piece in half with the wrong side inward, place the plastic piece inside and topstitch.
Step 3


photo: blog.spoonflower.com
Iron the fabric on the sides inward like an accordion so that there are allowances on the sides.
Step 4

photo: blog.spoonflower.com
Topstitch the folded edges of the pocket. Do this for each of the pockets.
Step 5

photo: blog.spoonflower.com
Now let's get to work on the base of the organizer. Place the plastic part between layers of double fabric part.
Step 6

photo blog.spoonflower.com
Place the pocket pieces on the base and pin them in place.
Step 7

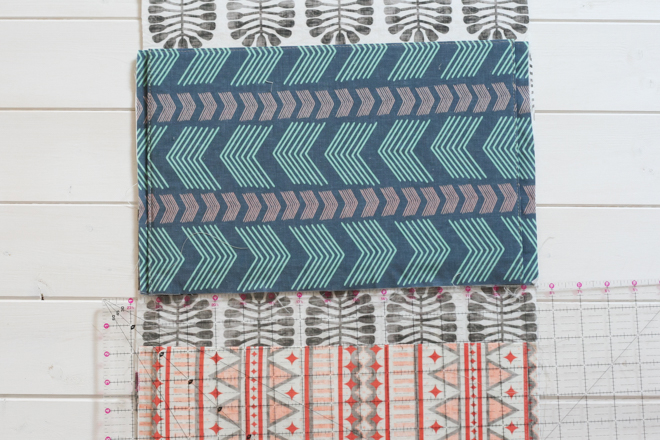
photo: blog.spoonflower.com
Sew the pockets to the base.
Step 8

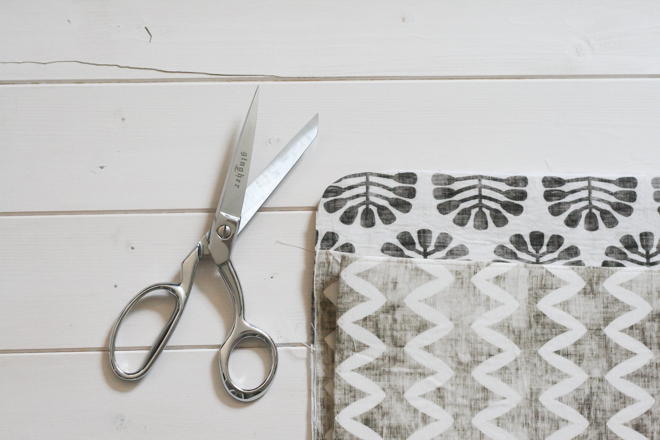
photo: blog.spoonflower.com
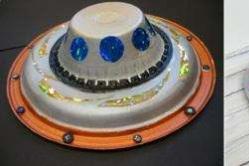
Using a round object as a template, round the corners of the base.
Step 9


photo: blog.spoonflower.com
Finish the organizer in a circle with bias tape or ribbon.
Step 10


photo: blog.spoonflower.com
Mark the location of the eyelets and install them. Ready.
Options for textile organizers with pockets

photo: apartmenttherapy.com

photo: handmadepride.tumblr.com
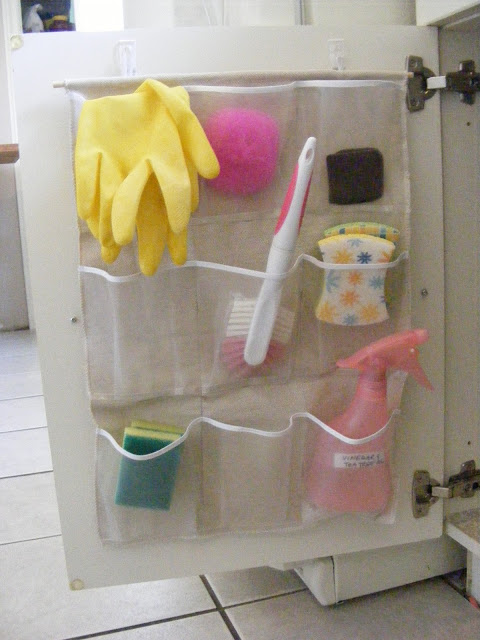
photo: imperfecthomemaking.com

photo: livesimplybyannie.com
A similar organizer can also be adapted for a bed.

photo: static1.squarespace.com
with your own hands
Organizer “plates” for the closet

photo: blog.spoonflower.com
If your closet does not have enough compartments with shelves, you can add them by sewing a similar organizer. It will come in handy in the bathroom, for example, for towels, in the nursery - for toys, and in the hallway - for hats and scarves.
You will need:
- The same amount of fabric for the outer and inner sides (take dense, strong fabric);
- A piece of Velcro tape (Velcro) 10+ cm long;
- Thick cardboard or plastic to strengthen the organizer;
- Hanger
Step 1


photo: blog.spoonflower.com
Cut out the fabric and cardboard according to the diagram in the picture (the number is the number of parts).
12 pieces 23x23 cm (lining fabric);
2 pieces 23x32 cm (main fabric);
2 parts 20x23 cm (main fabric);
2 pieces 32x69 cm (main fabric).
Don't forget to add 0.5 cm allowances.
Step 2


photo: blog.spoonflower.com
Sew 20x23 cm pieces as shown in the picture. Turn them inside out, iron them, and sew on Velcro.
Step 3

photo: blog.spoonflower.com
Mark the middle of this part and sew two lines to the middle of one of the parts of the main fabric 23x32 cm.
Step 4


photo: blog.spoonflower.com
Connect this piece to one of the lining pieces. Sew the parts together as shown in the photo. Insert cardboard between the shelf parts.
Step 5


photo: blog.spoonflower.com
Lay out the finished back part of the organizer on the table and baste, and then stitch the outer fabric parts 32x69 cm. On one side, leave an unstitched section for turning.
Step 6
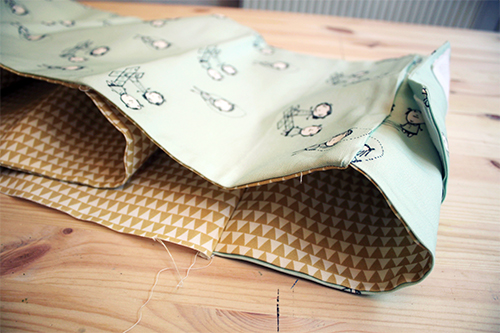
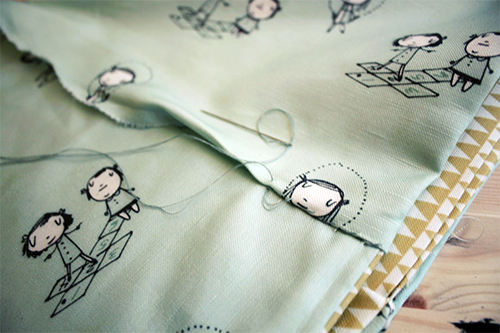
photo: blog.spoonflower.com
Turn it inside out and sew up the open section.
Step 7

photo: blog.spoonflower.com
All that remains is to attach the hanger with Velcro.
with your own hands
Wardrobe organizer options

photo: ebootcamp.org

photo: ebootcamp.org

photo: diyjoy.com
Options for organizing closet storage using homemade organizers
Storing shoes and bags:

photo: s-media-cache-ak0.pinimg.com
Shoe storage plus a “shelf” organizer option, supplemented with boxes:

photo: simplesdecoracao.com
Bag storage:

photo: cheapbuynsave.com
Shoe storage:

photo: casatemperada.blogspot.com
Homemade covers for clothes:

photo: amazinginterior-design.com
Bag organizer
Such an organizer will help, on the one hand, make a large bag that has no pockets more convenient, and on the other hand, it will make it easier to transfer everything you need from one bag to another. Very convenient for those who choose a new handbag for every outfit.This organizer is sewn from thin felt. We recommend this particular material: it holds its shape well and does not require edge processing.
You will need felt, a sewing machine, thread, scissors.
To sew an organizer, follow the instructions in the video:
Organizer options for small items:

photo: 1.bp.blogspot.com

photo: coupons.com

photo: craftbnb.com

photo: pdc2011.org
Each of us has so many necessary things in our handbags that sometimes it’s not easy to quickly find what you need. And if you have to change the bag, then “moving” takes a lot of time, and then how much time you need to spend to remember where and what is, because in different bags the location of the pockets and their number are different. Therefore, when I first saw an organizer for a handbag, I realized that I simply needed this thing. And I decided to sew it myself. The whole process took two evenings.
(all pictures are enlarged)
To begin with, I decided on the dimensions and drew a sketch.
dimensions
26
X 17
X 8
(cm)


Consumables : fabric of two colors, 0.4m X 1.4m, a small piece of lining fabric for the inner pocket, a 20 cm zipper, adhesive fabric or adhesive interlining to strengthen the sides and bottom (if necessary), threads to match the fabric.
We cut out the blanks (taking into account seam allowances of 1 cm on each side)
:
28 cm x 19 cm - 4 pcs. - large sidewalls of the outer and inner parts
10 cm x 19 cm - 4 pcs. - small sidewalls of the outer and inner parts
10 cm x 28 cm - 2 pcs. - bottom
and, if necessary, strengthen all parts with adhesive fabric.
Double pockets with a fold at the top edge
.
We cut out () 2 blanks for large external pockets 40 cm x 26 cm, 2 blanks for large internal pockets 40 cm x 22 cm. For small sidewalls, cut out blanks in the same way. The pocket blanks should be wider than the side pieces to allow slouched pockets to be formed. Along the fold, stitch all the blanks with one or two parallel lines.


On each of the side parts we form pockets according to the sketch, cut off the excess, remove the overlap into folds, thereby making the pockets voluminous.


Then sew the parts of the outer part into a ring
. We start the stitching from the top edge of the blanks and finish not reaching 1 cm from the bottom edge. This is necessary in the future for sewing in the bottom.


Steam and iron the seams
.
As a press for wet heat treatment (WHT), I use a small, smoothly ground one. birch block.


Now sew in the bottom . Let's start with the short part. It is necessary to bend the 1 cm seam allowance at the bottom of the side panel and pin the bottom to it with pins ().

Then we sew a line along the pinched short side, not reaching 1 cm from the edge on each side.

Now we turn back the allowance along the long side of the side, pin it with the long side of the bottom and also attach it not reaching the edge 1 cm. We connect the remaining sides in the same way. As a result, the corners of the unfinished allowances will look like this. We cut out the fabric in the corners and cut off the allowances along all seams to 0.5 cm.


The internal part of the organizer is done in exactly the same way as the external one, only first you need to do it on one of the large sidewalls internal zip pocket
.
I honestly don’t know how to do this according to all the rules of tailoring, so I figured it out and did it.
First, on the wrong side, I marked the place where the pocket would enter, cut it, folded it to the wrong side, basted and ironed the seam allowances. I placed a zipper on the wrong side, pinned it with pins and stitched it.


Then I treated the wrong side with a lining (also as best I could). First, I sewed small pieces of lining to the short edges of the zipper, and then larger pieces to the long edges of the zipper, without catching the main side fabric. This is what it looks like in the end:

Only after this we form and sew a pocket on the front side of the inside of the sidewall, bending the lining up .


Again we turn this piece face down and cover it with another layer of lining fabric, pin it together and sew this “pie” around the perimeter close to the edge. We cut off the lining fabric protruding at the edges and the result is this cute pocket, the inside of which is as beautiful as the outside (I love the beautiful backside).


Now you can sew all the details of the inside and sew on the bottom.


The resulting We put the “boxes” inside each other , close the top edge of the organizertape and sew a line along its edge.


That's all! The organizer is ready! Please love and respect!


Now I can find everything in my bag with my eyes closed.
And changing bags has become a pleasure; you just need to move the organizer from one bag to another! Just a matter of seconds!

You can do this too, you just have to want it! Good luck!
To make an organizer bag you will need:
- 2 types of fabric (main with a bright floral pattern) and finishing (bright red), the fiber composition of the fabric can be any,
- synthetic winterizer (density no more than 150 g/sq. m),
- threads,
- zipper 35 cm long,
- zipper 18 cm long,
- a small piece of thick transparent film,
- red grosgrain ribbon (width about 1 cm, length 50 cm),
- white lace of two types (in the form of braid and in the form of flowers),
- pieces of felt in yellow and bright pink colors,
- duct tape,
- scissors,
- chalk or soap for cutting,
- sewing machine,
- iron.
The process of making an organizer bag consists of 3 main stages:
1. Preparing the lining.
2. Preparation of the top.
3. Installation of the product.
Preparing the lining.
For a bag measuring 30*30 cm and 15 cm thick, you should cut out a lining measuring 77*47 cm. From all corners, the width of the lining should be cut by 3 cm, starting from the end cut and ending at 30 cm.
Numerous and varied pockets must be processed on the lining of the bag to suit the customer's requirements. For example, if a needlewoman is fond of knitting, it is advisable to make pockets for hooks and knitting needles, for various small things (stitch counter, measuring tape, pins). Some pockets can be closed with snaps, others with adhesive tape or a loop with a button - it all depends on what will be stored in them. If desired, some pockets can be decorated with decorative braid in the form of flowers - the product should look aesthetically pleasing both outside and inside. In addition to fabric pockets, you can also make pockets from thick transparent plastic. Its source could be, for example, packaging from some small items for handicrafts. The main thing to remember is that the more varied the pockets are, and the more of them there are in the bag, the more convenient it will be for the needlewoman to use it, and the process of needlework itself, organized in the best possible way, will bring her sincere joy and pleasure.


The prepared lining must be sewn along the sides, and then the corners must be stitched so that the width of the bottom of the bag is 15 cm.

Preparation of the top.
The top of the bag will consist of 3 parts - the main part and 2 finishing strips. The latter are cut out of finishing fabric, their width in the cut is 12 cm.
The size of the base of the bag should be equal in size to the lining. The prepared base of the bag should be stitched onto padding polyester. It must first be ironed on both sides through cotton fabric at the maximum temperature of the iron. Heat treatment will promote compression and compaction of the padding polyester. It will become stiffer and more elastic, losing its softness and airiness. But this is exactly what is needed - inserted into the bag, this material will give it dimensional stability. Next, you should cut out the handles of the bag, as well as a folding pocket with a zipper. The handle of the bag in the cut will be a rectangle with dimensions 8 * 108 cm (2 pcs.), the pocket detail will be a rectangle 17 * 20 cm (2 pcs.).
The parts of the handles should be folded lengthwise with their faces inward and stitched 1 cm from the cuts, turned inside out and ironed. The prepared handles need to be sewn together with the end cuts.
The details of the zipper pocket need to be cut with corners rounded on one side. They must be folded facing each other, inserting a zipper along two longitudinal and one transverse sections and stitched with a seam 7 mm wide. Then the pocket part must be turned out, ironed, and a finishing stitch must be placed along the edge.
After all the parts are prepared, you need to process the internal pockets in the zippered pocket. They can be made of fabric, as well as thick film, so that their contents are visible. Here you can also sew a felt pincushion made in the shape of a pillow, and make several loops from ribbon for hanging small items.
Then you need to process the zipper pocket at the same time as the shoulder straps of the bag.


The prepared top of the bag must be sewn along the sides in the same way as the lining and stitched in the corners.

Product installation.
Installation of the product consists of connecting the lining of the bag with its top. To do this, the lining should be placed in the upper part face to face and sewn along the upper edge. In one place you need to leave a section for turning inside out; there is no need to sew it up. After this, you need to turn the bag inside out and sew up the hole. Then a finishing stitch should be placed along the top of the bag. If desired, the edges of the bag can be ironed. The temperature of the iron should be low so as not to damage the film and plastic pockets in the bag.


The product is ready. You can fill it with tools and get to work.
French psychologists claim that a woman's messy bag indicates not only the dreaminess of its owner, but also passivity, disorganization and inability to get ready at the right moment. How to clean up your bag? Try sewing a bag organizer with your own hands.
You will need:
- two rectangular pieces of fabric (top and lining) - 70 x 25 cm;
- sewing machine;
- suitable threads;
- a piece of Velcro 5 cm and 30 minutes of free time.
How to sew a bag organizer with your own hands
For the top, it is advisable to choose a denser fabric (tapestry, faux leather, etc.). Can be duplicated with non-woven fabric or synthetic padding for strength.
We make a pattern, for example, like this: a rectangle 70 cm long, 25 cm wide.

- We cut out two rectangles from the fabric according to the pattern with seam allowances of 1 cm on each side.
- We sew the edges along the perimeter of the two rectangles, leaving a 5 cm hole unsewn for turning.
- We turn the organizer inside out, iron it, put a finishing stitch along the edge, while sewing up the hole for turning it inside out.
- We mark 10 cm from the edge of the product and draw a line with chalk - this is the fold line of the organizer. Fold the fabric and iron it.
- We sew on Velcro for the fastener (one part of the Velcro on the outside, the other on the inside).
- We sew up the short edges of the organizer.
- We decide what we will carry in the organizer: mobile phone, hair brush, notebook, pen, business card holder, etc.
- We outline future pockets. We sew them with a double stitch.
All! Your hand-sewn bag organizer is ready! Now it will take you exactly one minute to transfer the things you need from bag to bag!