Antipyretics for children are prescribed by a pediatrician. But there are emergency situations with fever when the child needs to be given medicine immediately. Then the parents take responsibility and use antipyretic drugs. What is allowed to be given to infants? How can you lower the temperature in older children? What medications are the safest?
Hand-knitted items are relevant at any time of the year. Owners of original knitted items always look fashionable, stylishly interesting and eye-catching. With the help of a correctly selected model, you can correct your figure, hide flaws and highlight your strengths.
Among the variety of knitted patterns, items knitted with jacquard patterns can be especially highlighted.
We present you a pullover with a jacquard pattern for every day.
Jacquard - fashionable pattern
Jacquard is a multi-color knitting, also called intarsia, in which colors change frequently, mainly at a distance of 2 to 7 loops. This technique is known in many countries, and the culture of a particular country finds its own interesting reflection in it. In products for the cold season, the winter theme predominates, in this case the Norwegian or so-called frosty pattern is often used.
Knitting technique

The jacquard technique involves knitting in stocking stitch (stockinette stitch). If you knit in the round, that is, only the front rows are knitted, this greatly simplifies the execution of the jacquard pattern. At the same time, the process of weaving threads of different colors always occurs from the wrong side, that is, the broaches and weaves on the front side of the product are not visible, but are hidden at the back. To avoid excessive density of the product, you should not use more than two colors in one row, otherwise a large number of broaches will make the knitted fabric too thick. For convenience and correct execution of the pattern, it is always necessary to check the pattern diagram, calculate the number of loops of different colors and strictly follow the instructions for the diagram. Skipping a few stitches can really spoil the whole pattern.
Advantages of jacquard pattern
A pullover with a jacquard pattern is a warm and practical, original and stylish thing that can be knitted as a gift not only for a girl or child, but also for a man. Using patterns with Norwegian patterns that can be found on our website, beautifully combining them with each other, you can create amazing sweaters, leg warmers, hats, mittens and many different wardrobe items.
- the thread in the broach should not tighten the fabric or sag; during operation, it is necessary to monitor the uniformity of tension;
- at the beginning of work, determine what color thread will be on top in the broach and always follow this principle;
- When switching from threads of one color to another, you must always cross them, otherwise holes will form in the fabric.
One of the most common Norwegian patterns is the star or snowflake, with a wide variety of sizes and shapes. You can knit such a pullover with a jacquard pattern.
Women's pullover with jacquard pattern and embroidery

The sweater is knitted with threads of contrasting colors, where white is the main color and the pattern is made in black; you can choose any shades, the combinations of which will look no less beautiful.
For a product for size 36-38 you need:
- 300 g of white yarn (160 m / 100 g);
- 100 grams of black yarn;
- circular knitting needles No. 3,5, 4;
- pattern;
- diagram of the pattern (we do not knit the deer, but embroider it after finishing knitting all the details; during the work process, knit this part in one tone with white threads).
We knit the rib at the bottom of the sweater and sleeves with smaller knitting needles, and the main parts with knitting needles No. 4.
Knitting the back
To knit the back, cast on 90 loops with threads of the main color and make a 2 x 2 elastic band with a height of 45 rows, this is 13 cm, it is worth noting that in our case we start and end the row after and before the purl loops, not counting the edge loops. When finishing the elastic band, distribute evenly and add 9 stitches and as a result we will get 99 stitches on the knitting needles. We continue knitting 18 rows in stockinette stitch. Let's start working with the image. We place the pattern between the edges, perform 78 rows from marks “a” to “c” with a Norwegian pattern, “e” is the middle of the pattern. At a height of 39 cm from the beginning, we knit the parts taking into account the formation of the armhole. We decorate it by closing 3 loops on each side of the back and in every second row 2 times 2.6 x 1. After finishing working with the pattern, we knit with the main color and at a height of 15 cm from the armhole we close the central 39 loops. To round the neckline from the inner edges, close two loops on both shoulders and after 2 cm close the remaining 15 loops on each shoulder.

We knit the front part according to the same pattern as the back, with a pattern and armhole, and make the neckline deeper. Having knitted a height of 11 cm from the armhole, we close the central 33 loops, and in every second row on the inner sides of the cutout 2 x 2, 1 x 1, we finish both parts separately. At a distance equal to the height of the back, close 15 loops on the shoulders.
For the sleeves, cast on 50 stitches and use an elastic band to make 12 cm. Before moving to the main part, add 1 loop at the edges and in the center of the row, for a total of 53 loops on the knitting needles. To expand the sleeves before the beginning of the armhole, you need to add 1 loop on both sides 9 times according to this pattern: in the 5th row, then 4 times in every sixth and eighth rows. We knit the elastic and stockinette stitch with white color before and after the pattern. At a height of 11 cm from the elastic band, we perform the Norwegian pattern from rows 53 to 78 of the pattern 3 times, the middle of the sleeve is indicated in gray on the pattern and we knit in white until the end. With a sleeve length of 43 cm, close 3 loops on the sides, in every second 7 x 2, 2 x 1, 7 x 2. Close the remaining 11 loops.
Before assembly, pin all parts, moisten, and dry naturally. Embroider deer along the back, front and sleeves according to the pattern. Sew along the seams. Along the neckline, cast on 104 loops and knit with an elastic band in a circle of 8 cm using knitting needles No. 3.5, switch to knitting needles No. 4 and perform another 12 cm. Finish the work.
Knitting is an opportunity to express beauty using thread. Scientists have proven that needlework on a biological level benefits a woman, gives her femininity and puts her in a peaceful mood. And when a craftswoman creates masterpieces with her own hands, this only adds to the benefits of creativity. The frosty pattern is knitted very easily using regular knitting needles, and the result will not leave you indifferent - the beautiful openwork is perfect for sweaters and shawls.
Knitting a frosty pattern with knitting needles: description and pattern diagram
Let's look at the description of the knitting pattern. The pattern itself is simple to make. The pattern is clear even to a beginner, but you should practice knitting.

When starting work, you need to master the skill of knitting crossed loops, loops on the front and back side, knitting two loops together on the back and two together on the front.
These loops are knitted quickly and easily.

- 16 loops are crocheted into a sliding loop. Using 4.5 knitting needles, pull the stitches out of the hook loops onto the knitting needles (4 knitting needles each with 4 loops, a total of 16 loops). A marker is attached, or a contrasting thread can be used. This is the beginning and end of the series. The diagram shows only the front rows and 1/4 of the circle. Knit 3 rows in the round.
- Take knitting needles No. 5. The 5th row is knitted. This is the front row. Crossed loop, 4 yarn overs, two crossed loops, 4 yarn overs, crossed loop. This is repeated 3 more times.
- 6th – row. Purl row. Here the crossed loop is knitted crossed, 4 yarn overs are knitted, k1, p1, k1, p1. etc.
- 7th row. Front row. All stitches are knit stitches.
- 8th – row. Purl row. All loops according to the pattern (front).
- 9th row. Front row. There are two loops in the diagram along with a tilt to the left. There is an option to knit the top piece. In this case, remove from the knitting needle and turn the loops, return them to the left knitting needle, call two together for the lower lobe, 1 knit, 2 yarn overs, 1 knit, two together with a tilt to the right for the upper lobes. Knit until the end of the row, without deviating from the pattern.
- 10th – row. Purl row. The loops that were knitted two together are removed behind the knitting needle. So we knit in the round, where there are two together. The front one is knitted with a knit stitch, 2 yarn overs (1 knit, 1 purl).
- 11th – row. Front row. Knits strictly according to the pattern. Knit this way up to 21 rows, making sure that the loops are even and not twisted.
- 21st – row. Front row. Knit according to the pattern. Two together with a tilt to the left, 1 knit, two together to the right, yarn over, 5 knit, yarn over, two together to the left, 1 knit, two together to the right, yarn over, 5 knit, yarn over. So - 3 more times.
- 22nd – row. Purl row, knitted according to the pattern. The row is circular. Where there were two loops together, the thread is removed strictly behind the knitting needle.
- 23rd – row. Front row. Three loops together (slip 1 loop, knit two together, pull through the removed one), 2 yarn overs, knit 7, yarn over, three together, yarn over, knit 7, yarn over.
- 24th – row. Circular purl row. Where three were knitted together, knit a knit stitch, two yarn overs, (1 knit, 1 purl,) all the rest - according to the pattern. All yarn overs that are made between the petals are knitted with knit stitches.
- 25th – row. Front row. Knit 1, from 1 loop, knit two (1 for the top, and 1 for the bottom). Knit 9, yarn over, knit 1, yarn over, knit 9, etc.
- 26th - row. Circular purl row according to the pattern.
- 27th – row. Front row. From 1 loop 2, from 1 loop 2, from 1 loop 2. Two together (to the left), knit 8, yarn over, 1 knit, yarn over, 8 knit, two together (to the right), according to the pattern, from 1 loop 2, from 1 loop 2. The knitting of the first petal begins.
- 28th – row. Circular purl row according to the pattern.
- 29th – row. Front row. Crossed loop, 2 yarn overs, 2 crossed, 2 yarn overs, 2 crossed loops, 2 yarn overs, 1 crossed stitch, two together (to the left), 17 knit stitches, two together (to the right).
- 30th row. Circular purl row. We knit according to the pattern.
- 31st – row. Front row. Crossed, 1 knit, 2 yarn overs, etc.
In this way, knit up to 46 rows. If the pattern is of sufficient size, you can finish the work; if more is needed, knitting continues.

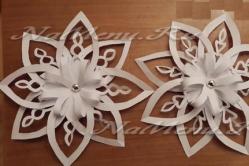
Thus, a square of petals is obtained, which form a frosty pattern.
This pattern is best suited for women's clothing - sweaters, raglans, jumpers. The pattern is interesting and openwork, looks good on thick sweaters - it lightens the product and makes it softer and fluffier.
Let's focus on the right choice of yarn
It is worth considering that this pattern is quite dense. Yarn that is too thick can look rough. When choosing a thread, it is best to knit a test sample with a pattern and evaluate the density of the product. It may be worth using knitting needles of a different diameter for the selected thread, or taking a different yarn.
Things knitted with this pattern, made of angora or wool, look ideal. The thing turns out to be very warm and as if weightless.
Cotton thread produces denser products. However, such a thread can add elasticity to the item. The pattern will be easy to read and will not lose shape when worn.

A selection of videos dedicated to the topic of the article will help you better understand the technology of knitting a frosty pattern.
Video on the topic of the article
Pullover Frosty pattern.MK.
For a very long time I wanted to knit such a pullover. I spent quite some time sorting out the pattern and finally knitting it together. In my personal opinion, it turned out to be a very beautiful, very winter and quite stylish pullover with short sleeves (wear under a turtleneck).
I used Nako yarn (as on the hat - http://knitly.com/14799) 400 g, stocking and circular knitting needles No. 4.5, with elastic band No. 4. 
The diagram used is shown below (the diagram is not mine, found on the Internet). 
The pullover is based on a square napkin, which is knitted from the center. The diagram shows 1/4 of this napkin. 
Instructions for the diagram. 
To avoid a very tight ring in the center of the flower, I cast on 4 chain stitches and knitted the required number of stitches from them onto stocking needles. This makes the center of the flower look much neater. 
When the central flower was ready, I switched to circular ones. 
I separated the loops for the collar (I got 22 loops), this is for size 48. 
You should end up with a square. Separate the loops for the sleeves, sides, and bottom onto additional knitting needles. Knit the second part (let's say the front one, with a large neckline) and sew the side and shoulder parts loop into loop. 
Flower petals are knitted in the sleeves (I left 25 loops on the sleeves from the front and back), then 8 rows of 2*2 elastic. 
The front and back parts were also lengthened with stockinette stitch by 7 cm, and then the elastic was 2*2 20 rows. 
Finally, the collar is knitted with a 2*2 elastic band.
The pullover is ready!
Author tayra.
"Frosty pattern" women's jumper. With a step-by-step description of the Little Mermaid from Osinka.
We need thread, 5 pcs sock knitting needles, a hook and knitting needles on a short line.
I will knit, 50g 70m. The thread is not thin. Knitting needles No. 5.
You need approximately 50g 70m, 80m, 90m, 100m. The pattern will be very visible.
1) And so. We crochet 16 loops into the sliding loop. Using 4.5 knitting needles, we pull the loops out of the hook loops onto the knitting needles (4 knitting needles on each with 4 loops = 16 loops). Attach a marker, if there is no marker then use a contrasting thread. This will be the beginning and end of the row. 

2) The diagram shows only the front rows and 1/4 of the circle. Knit 3 rows in the round, stop.
1.
Personally, I knit in the classic way. The front loop is behind the top lobule.
3) We knit further. And so, we knitted 4 rows (1 row, sliding loop and elongated loops, and 3 more rows).
Knitting needles No. 5. We knit the 5th row, look at the diagram. Front row. Crossed loop, 4 yarn overs, 2 double yarn overs, loops, 4 yarn overs, crossed. a loop. We repeat this 3 more times.
6th row. Purl row. Where is the cross. I advise you to knit the loop crossed (this is important), we knit 4 yarn overs, k1, p1, k1, p1. etc.
7th row. A row of faces. All face loops.
8th row. Purl row. All loops according to the pattern(s).


4) We knit further.
9-row. persons row. In the diagram, 2cm with a slant to the left, those who knit on the top lobe, remove from the knitting needle and turn the loops, return them to the left knitting needle, knit 2cm for the bottom slice., 1knit, 2 yarn overs, 1knit, 2cm with a slant to the right, for the upper lobules. We knit to the end of the row, strictly according to the pattern.
10-row. purl, row. This is IMPORTANT, the loops are knitted 2cm, remove the loop behind the knitting needle. So we knit in the round, where there are 2cm. Knit-knit, 2 yarn overs (k1, p1)
11th row. Persons row. According to the scheme
Knit up to 21 rows, I think everything will be clear. Make sure that the loops do not twist and are straight.
The pattern for the jumper was taken from such a napkin. Diagram for the pattern. 

5) And so we knit further.
Row 21, Knit row. We knit according to the pattern. 2vm with a tilt to the left, 1 knit, 2vm to the right, yarn over, 5 knit, yo, 2vm to the left, 1 knit, 2 ym to the right, yo, 5 knit, yo, and so on 3 more times.
Row 22, Purl, row according to pattern (circular row). DON'T FORGET where 2nd was, remove the thread behind the knitting needle.
Row 23, Knit, row. 3vm (slip 1 loop, knit 2 together, pull through the removed one), 2 yarn overs, knit 7, yarn over, 3 together, yarn over, knit 7, yarn over, (read the diagram in the round), another yarn over must be done, etc.
6) We knit further.
24 row. Circular purl. row. Where there was 3 stitches, we knit knit, 2 yarn overs, (k1, p1,) all the rest according to the pattern. Please note that we knit all the yarn overs between the petals.
25-row. Persons row, k1, from 1 loop knit 2, (1 for the top 1 for the bottom slice). K9, yarn over, k1, yarn over, k9, etc.

7)26-row. Circular purl row according to the pattern.
27 row. Persons row. from 1 loop 2, from 1 loop 2, from 1 loop 2. 2vm (left), 8 knits, yarn over, 1knit, yo, 8 knits, 2vm (right), according to the diagram, from 1 loop 2, from 1 loop 2. we start knitting from 1- 5 petals.

8)28-row. Circular purl, row according to the pattern. DON'T FORGET where the 2nd stitch was, remove the loop behind the knitting needle

9) For those who have already knitted everything, I’ll give you some advice: knit rows 47 and 48. They are not on the diagram, but the drawing looks better and more complete.
For those who knit row 29.
29 row. Faces, row. Sk stitch, 2 yarn overs, 2 yarn overs, 2 yarn overs, 2 yarn over loops, 2 yarn overs, 1 yarn over, 2 stitches (left), 17 knits, 2 yarn overs (right). etc.
30 row Circular purl row. We knit according to the pattern, but remember the tips. Where 2vm, remove the thread behind the knitting needle. 2 yarn overs (k1, p1), Where crossed we knit crossed.
31st row. Knit row Sk, k1, k2, etc.
Girls knit up to row 46 inclusive.
Select a closing option:
Option No. 1. Close along the side shoulder lines, leave loops for the sleeve, neckline, and waist.
Option No. 2. In the open loops, thread the thread (thick, with a needle) in a circle.
Both options, moisten or wet heavily (it depends on the thread). Do not squeeze, but wrap in a towel and squeeze. Straighten it, give it a square shape. (on the table, floor)
Girls, that's it, we've finished our square. We knit the second half, DON’T FORGET who added rows, add in the same way.

This is what the pattern should look like at this point in knitting. 
QUESTIONS WHEN KNITTING:
---hi all!
I've been struggling with the "frosty pattern" for a week now. I've mastered 19 rows. 21 rows - just questions. There are not enough loops to cast on. After the 19th row, there are 12 loops left on the knitting needle, and to cast on the 21st row you need 20 loops. What did I do wrong?
Everyone writes that they can do everything so easily - it makes me so jealous... I’ve already changed the threads three times, unraveled the knitting five times... Why is it so hard for me?
Everyone in the family can't wait for this fight to end. Who will win: me or the pattern?
I can't figure out where I went wrong. Row 20 (this is like the wrong side of row 19) consists of 12 loops: slip 1, knit, knit, purl. persons 1 remove. 1 remove faces. persons Remove purl face 1. In the 21st row you already need 20 loops to cast on. So I don’t have them.
Girls, please help me
MY POWER IS NO LONGER!!!
ANSWER: Klenushka 2010, we made a mistake.
19- row 2 inm to the left., 1 knit., yo., 1 knit., 2 knit. to the right., yo., 3 knit., yo., 2 knit. ., yarn over etc.
20-row. Circular purl. row according to the drawing. Slip 1 stitch behind the needle, k3, slip 1, k5, slip 1, k3, slip 1, k5, etc.
Purl, no loops.
*****************************************************************************************************
Rusalok4ka, tell me, what do the curly brackets above row 45 mean in the diagram?
We don't pay attention to them.
******************************************************************************************************


12) We knit further. We knit an elastic band at the waist, collar or sleeve. First I knitted an elastic band at the waist, returning all the open loops to circular knitting needles. The loops we have are not enough for us. I did the following: knit in the round, row 1, k1, chain 1, knit 1, chain 1, etc., so I added half the stitches. . Row 2, knit 2, purl 2. Row 3, k2, slip yarn behind needle, purl 2. Row 4, knit 2, purl 2, etc. Where stitched, pull the loops out of the stitches. At the end of our elastic band, switch to 1*1, knit 2 rows, close with a needle and thread.

13) The collar also needs to be knitted in the round, and loops added as well. I knitted the sleeves in short rows. From the top of the sleeve collar, determine the center, from the center to the right by 5,6,7 loops, start knitting, gradually include the open loops in the work. We also need to add loops. I knitted as follows, k1, chain 1, knit 1, wag 1, and so on until the moment when you need to turn the yarn over.
I did the yarn over work, turn it, we knit 2 knits, purl 2, we reached the end (the beginning of our knitting), connect 2 loops, turn the yarn over work (open loops), girls, this work requires a lot of attention, so I’m writing to you and wondering if it’s clear or not, I’ve already knitted it It's easy for me.
!!! You must connect 2 loops at the same time, make increases in the form of an air loop, shorten rows, make broaches on the wrong side (for those who have made such an elastic band).
But it turns out to be a nice wing, knit quickly.


SUCCESSFUL PERFORMANCES:
1) Threads - Zerda from Lanoso.
2) A good collar. Kandy threads, Vitov needles 4 and 3.
3) Length 58 cm, consumption exactly 400 g of acrylic flora card, 230-100 g in 2 threads, knitting needles No. 4, elastic bands on the machine in 1 thread. 

4) Bingo threads, Italy 50g/80m, knitting needles No. 6, all knitted using open loops, I liked the threads, voluminous, soft, warm, they didn’t lose their appearance after washing. 
5) Merino Austermann yarn, 50 g - 125 m, back knitted
Let's start knitting indescribable beauty for ourselves and our loved ones... frosty patterns
First I shared my find... and since there were many of us who wanted to knit this beauty... we started knitting together... in company...
The survey took place in two posts... because I violated the group rules with the second post... and the post was moved to my diary
Poll in the Country of Mothers:
Would you like to link this beauty online?
72 users took part in the survey.
in total there are 176 of us who want to start immediately
and 197 people can join us... and that's great
I’m honestly telling you... I knitted it according to the pattern... I took thin threads... 240m/100g... it looks like my little one-year-old daughter... it has grown a little...
What we need to know first...
1) The sleeveless vest is knitted from the center front/back and then in the round. At the same time, if desired, the back of this sweater can be knitted in the same openwork pattern as the front, or it can be knitted simply with stockinette stitch.
2) TIPS from girls from Osinka:
The right yarn is the key to success! Since the knitting pattern does not involve changes, i.e. the pattern is such that it is very difficult to shorten or lengthen it, the size of the future product depends entirely on the thickness of the yarn and the size of the knitting needles. The yarn should not only be of a suitable size, but also quite voluminous (that’s why I chose acrylic for knitting). Before starting knitting, I recommend trying to knit a sample using different types of yarn (and different numbers of knitting needles), then wet the samples and dry them on a flat surface.
I recommend knitting the central “Star” pattern for the sample, then measure the length of the diagonal (from the edge of one ray of the star to the opposite edge, passing through the center) and multiply by a factor of 2.3. The resulting value in centimeters will mean the approximate (!) length of the diagonal of the finished sleeveless vest, which will be obtained by continuing knitting with the selected yarn and knitting needles.
3) By meter, take yarn from 100m/100g to 200m/100g no thinner...
4) We will need 5 toe knitting needles, the number of knitting needles depends on the yarn... but not thinner than No. 4, a hook similar to the number of knitting needles and 2 pairs of short knitting needles on a fishing line, the same numbers as the hook with toe knitting needles...
5) From girls from Osinka, a pattern has been developed for sizes 44-46... in their case, the diagonal of the “Star” is 23 cm, the length of the diagonal of the finished front is approx. 53 cm. The length of the side of the square can be calculated as the length of the diagonal divided by 1.4. From here we get that the side length is approx. 38 cm. All these calculations were made in a non-stretched form; similar values can be calculated on a stretched sample.

It is recommended (especially for beginner knitters) to knit the back with an openwork pattern, since in this case both the front and the back are equally elastic (due to knitting in the circle, the knitted fabric stretches equally well in all directions), in addition, with this method of knitting you can completely avoid seams by connecting the loops with a knitted seam, i.e. loop to loop.
When knitting the front and back openwork, I recommend starting with knitting the back - it will be a simple square (without a neckline recess), in the front you need to knit a neckline recess.
1. Back.
We knit according to the pattern. The diagram shows 1/4 of the pattern. Please note that the diagram shows only odd rows, about even rows, i.e. purl... I will write below.
This is a more complete diagram... the square is larger 
The set of loops of the first row must be done as follows: cast on 16 single crochets and distribute them on stocking needles, as shown in the figure:
(I’ll describe it in more detail below) 
This diagram is slightly different from the previous one
This is the pattern for the sleeveless vest taken from this napkin. 
Symbols for the diagram (front odd rows):

For even purl rows:
where were the facials - facials
where were 2 together - remove the loop, thread at work
where 1 yarn over - 1 knit from a crossed yarn over
where 2 yarn overs - k1, p1 (this is IMPORTANT!)
where the crossed loop is the crossed knit stitch
where 3 together - 1 knit
So. We crochet 16 loops into the sliding loop. Using knitting needles, pull the loops onto the knitting needles from the hook loops (4 knitting needles on each with 4 loops = 16 loops). We attach a marker, there is no marker then a contrasting thread. This will be the beginning and end of the row.


Knit 3 rows in the round. All stitches are knitted. 
We knit further. So, we knitted 4 rows (1 row, sliding loop and elongated loops, and 3 more rows). 
5th row: 1 crossed loop, 4 yarn overs, 2 crossed loops, 4 yarn overs, crossed. a loop. Repeat 3 more times on the remaining 3 knitting needles.
6th row. Purl row. Where is the cross. I advise you to knit the loop crossed (this is important), we knit 4 yarn overs, k1, p1, k1, p1. Repeat 3 times.
7th row. A row of faces. All face loops.
8th row. Purl row. All face loops. 
9-row. persons row. In the diagram 2cm with a slant to the left, those who knit on the top lobe, remove from the knitting needle and turn the loops, return them to the left knitting needle, knit 2cm for the lower slice., 1knit., 2 yarn overs., 1knit., 2cm with a tilt to the right, behind upper lobules. And so on until the end of the row. Strictly according to the scheme
10-row. purl, row. This is IMPORTANT, the loops are knitted 2cm, remove the loop, the thread behind the knitting needle. So we knit in the round, where there are 2cm. Knit-knit, 2 yarn overs (k1, p1)
From the 11th row to the 14th row - we knit as the 9th and 10th rows. 
15 row. A row of faces. 2wm with a tilt to the left, 1knit., 2 yarn overs., 1knit., 2wm with a tilt to the right for the upper lobes, yo, 2wm with a tilt to the left, 1knit., 2 yo., 1knit., 2wm with a tilt to the right for the upper lobes, 2 yo . Repeat 3 times.
Row 16: Purl. row. Remove 1 p, thread at work, k1, from 2 yarn overs - k1, purl 1, k1, 1 p. thread at work, slip 1 p, thread at work, k1, from 2 yarn overs - k1, p1, k1, k1, slip. thread at work; repeat 3 times.
Row 17: Knit row. 2vm with a tilt to the left, 1 knit, 2 yo, 1 knit, 2 yo with a tilt to the right for the upper segments, yo, 1 knit, yo, 2 knit with a tilt to the left, 1 knit., 2 yo., 1 knit, 2 yo with a tilt to the right for top slices, yarn over, knit 1, yarn over. Repeat 3 times.
Row 18: Purl. row. Remove 1 st, thread at work, k1, from 2 yarn overs - k1, purl 1, k1, remove 2 sts. thread at work, k1, slip 1 p, thread at work, k1, from 2 yarn overs - k1, purl 1, k1, slip 1. thread at work, person 1; repeat 3 times.
Row 19: Knits. row. 2vm with a slant to the left, 1knit., yarn over, 1knit., 2vm with a slant to the right, for the upper lobes, yarn over, 3knit, yo, 2vm with a slant to the left, 1knit., yarn over, 1knit., 2vm with a tilt to the right for the upper lobes, Yarn over, knit 3, yarn over. Repeat 3 times.
Row 20: Purl. Row 1 p, remove thread at work, k1, from yarn over - k1, k1, k1, remove. thread at work, k3, slip 1 p, thread at work, k1, from yarn over - k1, k1, slip 1. thread at work, 3 persons; repeat 3 times.
Please note that when knitting the “Star” pattern, the pattern is not flat, but convex. Subsequently, after washing and drying, the pattern will straighten.
21st row: Knits. row. 2vm with a tilt to the left, 1 knit, 2vm to the right, yarn over, 5 knit, yo, 2vm to the left, 1 knit, 2 ym to the right, yo, 5 knit, yo, and so on 3 times.
Row 22: Purl. row. 1 p slip, thread at work, k1, slip 1 p, thread at work, k7, 1 p slip, thread at work, k1, 1 p slip, thread at work, k7. Repeat 3 times.
Row 23: Knit row. yarn over, 3tog (slip 1 loop, knit 2 together, pull through the removed one), 2 yarn overs, k7, yo, 3 together, yo, k7, yo. Read 3 times.
24 row. Out. row. K1, where there was 3 in, we knit knit, 2 yarn overs, (k1, p1,) all the rest according to the pattern. Please note that we knit all the yarn overs between the petals.

The star is closer 
Closer look at the pattern 
25-row. Persons row. from 1 loop, knit 2, (1 for the top slice, 1 for the bottom slice), 1 knit, from 1 loop, knit 2, (1 for the top slice, 1 for the bottom slice), 9 knits, yo, 1 knit, yo, 9 knits. Repeat 3 times.
26 row. Purl row. all facial.
27 row. Persons row. from 1 loop 2, from 1 loop 2, from 1 loop 2, from 1 loop 2, from 1 loop 2, k2 to the left, k8, yarn over, k1, yarn over, k8, k2 to the right. Repeat 3 times. (We start knitting 5 petals from 1 petal)

Thanks to Mishutina’s mother, there are readable diagrams
Row 28: Purl. row, k10, slip 1 p, thread at work, k19, slip 1, thread at work. Repeat 3 times.
29 row. Faces, row. Sk stitch, 2 yarn overs, 2 stitches, 2 yarn overs, 2 yarn overs, 2 yarn overs, 2 yarn overs, 2 yarn overs, 2 yarn overs, 2 yarn overs, 1 yarn overs, 2 stitches to the left, 17 knits, 2 yarn overs to the right. Repeat 3 times
Row 30 Purl row. Sk stitch, k1, p1, 2sk, k1, p1, 2sk loops, k1, p1, 2sk, k1, p1, 2sk loops, k1, p1, 1sk, 1p remove. thread at work, k17, 1p, remove. thread at work. Repeat 3 times
31st row. A row of faces. Sk stitch, k1, 2 yo, k1, 2 yo, k1, 2 yo, k1, 2 yo, k1, 2 yo, k1, 2 yo, k1, 2 yo, k1, 2 yo, k 1, 2 yo ,K1, 1skr, 2vm left, 15knits, 2vm right. Repeat 3 times.
Knitting 47 and 48 rows
We tie the square according to this pattern
After the pattern is completely knitted, we transfer all the loops to the auxiliary thread (the thread should be long enough so that you can freely distribute all the loops along it and lay out the back in the form of a square).
Then it is recommended to wash the back and dry it on a flat surface, stretching it slightly so that the pattern becomes flat.
When using wool or cotton yarn, the product can also be ironed (under no circumstances should yarn with acrylic be ironed!).
2. Front
We knit similarly to the back. In the 38th row of the pattern, to form the neckline, remove the middle 9 knit stitches onto an auxiliary needle. (These are the last last stitches when knitting in a circle, then the next row will follow)
Next, we switch to knitting with front and back rows, continuing to knit the pattern according to the pattern.
To form a deepening of the neckline, to the right and left of the removed loops, at the end of each row we unknit several loops, and also transfer them to the auxiliary knitting needle:
in rows 38-41 - unknit 2 loops on each side, in subsequent rows - unknit 1 loop.
If you knit 48 rows... then we start forming the neckline not from the 38th row, but from the 40th.
Forming the neckline at the front. 

After the front is completely knitted, we transfer the neck loops to one auxiliary thread and tie the ends of this thread in a knot. We transfer all the remaining front loops to another auxiliary thread, and it is recommended to start stringing loops from the neck, i.e. first transfer the shoulder loops, then the side surface, bottom, etc.
After transferring all the loops, break the auxiliary thread, leaving long ends on both sides so that all front loops can be freely distributed on the thread and laid out on a flat surface. This stringing is necessary to make it more convenient to sew the shoulder seam loops in the future.
Wash and dry the front, laying it out on a flat surface.
3. Assembly.
Fold the front and back with the wrong sides facing each other so that the pattern on them matches.
Then we sew the loops of the shoulder seam with knitted seams, as follows: 
In this case, it is recommended to start stitching from the neckline and go in the direction of the sleeve neckline. Do not secure the ends of the thread you are sewing with, but leave the ends approx. 15 cm free. This is necessary in case it is necessary to make a few more stitches in both parts - at the beginning or at the end of the shoulder seam.
Another important point: the shoulder seam goes from the neckline to the third (central) petal of the pattern; it is recommended to sew a couple more loops after this petal. This is necessary so that the seam fits better on the shoulder and so that the cuff of the armhole does not bulge upward.
This is approximately 17 loops.
Next, we sew the loops of the side seams in the same way: from the middle of the side and further down to the third central petal.
It is recommended to sew together 2-3 additional loops in these seams at the bottom to narrow the sweater at the waist and leave the ends of the thread free so that you can sew or unravel several stitches if necessary.
Approximately the side seams contain 30 loops.
4.
We transfer the remaining loops of the neck, sleeves and bottom to separate auxiliary threads.
Please note that all these elements will be knitted with a 3 by 3 elastic band (or, if desired, 2 by 2), and therefore the number of loops in them should be a multiple of 6 (or 4, for a 2 by 2 elastic band).
The number of loops for the neck, sleeves and bottom can be adjusted using the thread ends left when stitching (for example, sew or unravel 1-2 loops), as well as using decreases, i.e. knitting 2 loops together (it is important to distribute the decreases evenly around the entire circumference).
By the way, at this stage the sweater can already be tried on your figure.
Sleeve knitting pattern (optional) 
5. We transfer the sleeve loops (about 48 loops) to the knitting needles and knit 7 rows (2.5 cm) with a 3 by 3 elastic band, close the loops, tightening them a little so that the cuffs do not puff up.
According to the experience of knitters, it was said that it was not immediately possible to achieve the required elasticity of the edge, which led to the fact that the head did not fit into the sweater or the edge of the bottom was very tight on the product :-)
The problem was that we tried different methods of closing the loops, but could not find the most elastic method, so we decided to knit the neck of 54 loops and the hem of 90 loops separately, and then sew them to the sleeveless jacket with a knit stitch.
Thus, the problem of elasticity of the edge was solved; in addition, a clear advantage of this method was that it was easier to arrange the elastic band beautifully and symmetrically relative to the openwork pattern.
The neckline and bottom consist of 40 rows (15 cm), knitted with a 3 by 3 elastic band.
7.
The finished product can be washed again, dried on a flat surface and ironed.
Attention! Yarn containing acrylic cannot be ironed!
Successful embodiments of the sleeveless "Frosty patterns" by knitters.
(if anyone recognizes themselves in the photo and doesn’t like it... please write... I’ll delete it)